These are the elements to assemble your own hand-made Valentine in Pages. See how to do it in this earlier post.
Showing posts with label iWork Valentine. Show all posts
Tuesday, February 14, 2017
Valentine's Assembly.
These are the elements to assemble your own hand-made Valentine in Pages. See how to do it in this earlier post.
Tuesday, January 14, 2014
St.Valentine Projects in iWork.
I designed this picture in Pages for a Valentine's project. You can draw one like this with just the tools provided in iWork Pages and transfer it to electronic and printed documents —cards, posters, letters, as well as putting it on button-badges, t-shirts and mugs.
Follow the Valentine's tag to see how to make one like this and other posts related to St.Valentine's projects.
Read more in my new book 'iWork for Mac OSX Cookbook' (2012). Follow me on Twitter at iworkinpages, like my page I Work in Pages on Facebook and add me to your circles on Google+.
Thursday, February 14, 2013
Saint Valentine's.
This is a Valentine's I designed in Pages some time ago. Follow the Valentine's tag to see how to make one like this and other posts related to St.Valentine's projects.
Read more in my new book 'iWork for Mac OSX Cookbook' (2012). Follow me on Twitter at iworkinpages, like my page I Work in Pages on Facebook and add me to your circles on Google+.
Thursday, February 09, 2012
Valentine's Projects on I Work in Pages
For your Valentine's projects, have a look at these previous articles on I Work in Pages which describe how to draw heart shapes, smiles and compose designs with a love theme.
Sunday, February 13, 2011
Valentine Face: Drawing Wrinkles
The simplest way of doing it is to draw a two point line with the Draw tool: click plus click and double click. Then make it editable and smoothen: Format>Shape>Make Editable and Format>Shape>Smoothen Path. Curve the line with ‘propellers’ on editing points. I used this method to draw the mouth.
To make more complex shapes that look like they were drawn by a felt-pen I used rectangles.
![]() |
1. Insert Rectangle |
Insert a rectangle, make it black, then make editable and smoothen path as above.
Squash using white square handles and curve using red editing points.
![]() |
2. Make Editable and Smoothen |
Work on a large rectangle first, because it’s difficult to edit small images. When you finish curving, check ‘Constrain proportions' box in Metrics Inspector and reduce size.
You need more than one shape for eyebrows and wrinkles. Don’t do them all from scratch again. Just duplicate (Command+D) the first shape as many times as you need. Then place them roughly on the face and rotate, flip and change size (all in Metrics Inspector or press Command and drag the shape’s ‘handles’). If you want to edit one or more shapes copy-paste it into a blank document, enlarge and make the changes, then copy-paste back onto the image.
![]() |
3. Squash and curve |
The nose is a simple oval with gradient colour fill.
Print your finished Valentine to PDF, JPEG or PNG, put it on a card or attach to an email – send!
Friday, February 11, 2011
Valentine's Dreamy-Lovey Image: How to Draw Droopy Eyes
In the previous post I showed how to draw a Valentine's heart with the Pages Draw tool. Read how to make wrinkles, mouth and eyebrows in this next article.
This is the finished Valentine's picture – Dreamy-Lovey. Here I explain how to draw 'droopy' eyes.
![]() |
1. Insert a triangle |
2. Then make the triangle editable: Format>Shape>Make Editable.
![]() |
2. Make editable |
3. Then give the triangle curving contours: Format>Shape>Smooth Path.
4. Next, double click on the two bottom editing points (little red dots) to turn them back into sharp corners.
![]() |
3. Smooth path |
5. Now, click on the editing point at the top of the shape – it will show a ‘propeller’ with two little circles on the tips. Click and hold on them, drag up and down, left right, extend or push in – to adjust curves, make them more or less rounded. Move the editing point with cursor or keyboard arrows – to change the ‘expression’ of the droopy eyes.
![]() |
5. Adjust curves |
Tip: press Command after you start moving editing points to stop them ‘snapping to grid’ – trying to align themselves with other points of the shape.
Tip: you don't need to draw the second eye from scratch. Just duplicate the shape: Command+D and change it slightly for symmetry or to give the face more expression. This applies not just to the two eyes, but to the heart shape as well. The cloud of little 'dreamy hearts' are duplicates of the main heart shape. I changed the colour of the little hearts and made the dimple on the top of the main shape less pronounced.
In the next post I'll show how to make 'smile wrinkles'. And here are all the graphic elements of the Droopey-Lovey:
Thursday, February 10, 2011
Draw a Heart in Pages
Check out another great Valentine's idea in this article
Here is a quick way to draw a Valentine's heart with Pages tools.
![]() |
1. Rough shape, four points |
1. Open a blank document, click on Shapes in the tool bar and choose the Draw Tool. You can also access Draw tool via the main menu: Insert>Shape>Draw a Shape. Draw a rough outline first by clicking five times with the little pen of the Draw tool, the fifth click is onto the first point – to close the shape. You now have a shape that looks something like in the first picture.
2. Next step – make the shape editable. Under Format menu slide down to Shape and choose Make Editable.
![]() |
2. Curved, editable shape |
3. Next, make the shape curve – Format>Shape>Smoothen Path. After that you have a shape that looks something like in the second picture.
4. Now, the heart shape should have a sharply outward cornered bottom and an inward cornered dip in the middle at the top. Here is the trick to achieve this. The red points (dots) of an editable shape allow you to edit it – change its contours. Click on the red point and when it turns white double click on it. The curves will turn into a corner. Next double click on the editing point in the top middle.
Tip: if you accidentally go off the shape, make it editable again by clicking, pausing and clicking again – two clicks, not double-click.
![]() |
3. Cornered bottom and middle top |
After this you will have a shape that looks something like in the third picture.
5. Next you need to give the heart the curves to give it a finished look. The editing points at top left and right will show 'propellers' when you click on them. Click on the white points at the tips of the propeller and drag. Drag propeller points out or in (extend or shorten them) to make the curve more rounded, drag propeller points up and down, left and right to change the flow of the curved shape. Move the editing points one by one to change the look of the shape.
Tip: editing points will try to align themselves against each other if snap-to-grid function (or alignment guides) is on. To disable it temporarily while you work on the shape press Command key as you move the points. Alternatively, use keyboard key to move the points.
6. When you are satisfied with the look of the shape, play with the thickness and colour of the outer border (Stroke, in Graphic Inspector). To add volume to heart try giving it gradient (changing) colour fill, try changing the direction of the flow of colours by rotating the wheel in Graphic Inspector. In the example above the deeper red colour is a slightly adjusted Marascino and the pink at the bottom is a slightly modified Salmon.
See how to draw wrinkles, mouth and nose in this article and how to make droopy eyes here.
This is the finished image:
Thursday, February 12, 2009
Floral Heart Medallion for Valentine's

Here is another great idea on how to do a Valentine in Pages.
I must give credit for this design (image below left) to Jumsoft.com, a dynamic Lithuanian company which produces a brilliant array of templates, clipart and applications for Macintosh users. They include iWork templates, themes and clipart.

The beauty of Jumsoft's templates is in simple creativity. Even if you are not planning to buy clipart or templates, visit their web-site for ideas.
I was flicking through Jumsoft's Pages samples when I saw this lovely Book template 
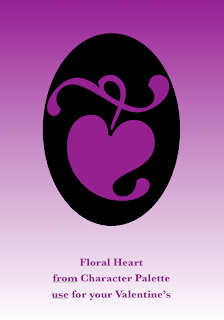
(image at the end of the post). The central image looked familiar and soon I remembered where I'd seen it - the Character Palette. It is called Floral Heart and sits with a selection of other heart shapes in Miscellaneous folder.
I recreated this design (top right) in Pages.
How to:1. CHARACTER. Open the Character Palette and find Floral Heart under Symbols>Miscellaneous, drag and drop it into your Pages doc. Characters from the Palette are manipulated like text. Make it really big - here the font size is 313 points.
Choose colour (Command+Shift+C - to open Colour Palette). The colour used here is called Plum in the Crayon box.
2. BACKGROUND. Go to Text Inspector>More> Background Fills - tick either character or paragraph box, click on the colour tab and choose black (Licorice).
You can fiddle with the Heart as it is at this stage - to position it in the centre of the page. But it might be easier to do the following step.
3. IMAGE. 'Print' your Pages document to iPhoto (or PDF) - open Print Dialogue and find this option under the PDF drop down menu.

4. COLOUR. Now, 'Colour' the Page: create a rectangular shape, resize it to go over the page margins.
In Graphic Inspector click on Fill and choose gradient colour fill. Click on the top bar and choose Plum, for bottom choose Snow (white).
Under Arrange menu choose Send to Back or Send Object to background.
5. MEDALLION. Go to iPhoto or wherever your 'printed' Heart image is stored and import it back into the Pages document. Position in the centre and adjust the size.
Under Format menu choose Mask with Shape>Oval. Adjust the mask and position of the image inside the mask to get the perfect 'medallion' look.
6. MESSAGE. Import a text box and write your Valentine's message.
Look at the sequence of pages in the Jumsoft palette below: the same Floral Heart image is used in several different ways and sizes - as a faded background image, on a different background or as a vignette, or a bullet. Which creates a themed romantic style.

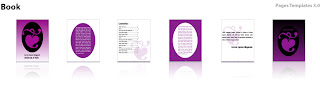
Original design of the Book Template by Lina Kruopyte
Please read these recent articles on Valentine's clipart and graphics:
Valentine's Clip Art and Graphics: How to make it in Pages
Clipart for iWork Pages: Where is it?
The Hughes Family Pages Templates
Valentine's Clip Art and Graphics: How to make it in Pages
Clipart for iWork Pages: Where is it?
The Hughes Family Pages Templates
Tuesday, February 10, 2009
Valentine's clipart and graphics: how to make it in Pages

Have a look at another Valentine's heart and read a later article here
This is a small bit of Valentine's clipart hand-made by me in Pages with just the tools available in the programme. Here is how to do it.


2. Work on the heart shape by making it editable: click on the shape, pause, click again - little red dots appear. Click to turn a red dot into a white circle with ‘propeller’ handles. Move dots with mouse or keyboard keys to change the contour of the shape and rotate, extend or shorten 'propellers' to change the way shape curves.
3. To make the bottom end of the heart ‘sharp’ move the propeller handles towards the red circle until they disappear.

4. Add 3D effect with Gradient colour fill. In the Crayon Box of the Colour Palette colours which are next to each other work best. Add ‘glowing’ effect with Shadow (both in Object Inspector).
5. When you are satisfied duplicate your heart shape (Command+D) and move, rotate, flip and send backwards or forwards the two shapes. To rotate press Command and click on a handle (litlle squares in the corners of the selected shape) or use rotating wheel in the Metrics Inspector. Flipping is in Metrics and Sending backwards and forwards is under Arrange menu. That way you get an ‘embracing’ effect.
6. To add a ‘piercing’ arrow:
- open the Character Palette>Arrows.

- Take a screenshot of the arrow and import the .png image into Pages.
- Remove white background with Instant Alpha (under Format menu).
- Duplicate and mask one half of the first arrow, and another of the second. Now, under Arrange menu, Send to Back the first half-arrow, and Bring to Front the second half-arrow.
- Next, move and rotate the two half arrows so that it looks as though one arrow pierces the two loving hearts.

Set yourslef in the mood by listening to this beautiful piece of love music by Georgi Sviridov.
If you find drawing your own original shapes too much work you can use a selection of hearts from the Character Palette>Miscellaneous or use Gem Hearts in HD>LIbrary>Application Support>Apple>iChat Icons.
You are welcome to send me your Valentine’s projects made in Pages and I will publish them here.

Please read these earlier articles on I Work in Pages:
Clipart for iWork/Pages - where is it
Creating clipart and original shapes in Pages
Curving lines and shapes: make them in Pages
Moving shapes backwards and forwards, screenshots and other shortcuts
Thursday, February 05, 2009
Valentine's clipart and graphics - make it in Pages

You can read the detailed how-to post here and read a 2011 article with another heart here
This is a small bit of Valentine's clipart hand-made by me in Pages with just the tools available in the programme.
Total time: 20 minutes. Result: lots of love to - and from - my loved ones.
There are four shapes. Two hearts are drawn with the free drawing tool under Shapes menu (last option in the drop-down menu). The arrow is from the Character palette>Arrows.
There are several hearts in the Character Palette you can use to create your own clip art and there are jem hearts in iChat icons folder - use them as well.
I will post a more detailed description of how to make this graphic design in a few days, but if you stopped by to have a look at this post why not listen to Georgi Sviridov's Romance, possibly the greatest piece of love music ever created.
Please check these previous articles on clip art for and graphic design in Pages:
Drawing letters and images in Pages
Where is clipart for Pages
Clipart for iWork/Pages - where is it?
Subscribe to:
Posts (Atom)
Copyright
© 2006-2010, 2010-2017 Alexander Anichkin, All Rights Reserved.
All content is original and was created by me, the author and publisher of I Work in Pages.
Quotations and images are attributed where applicable.
No republication without express prior permission.
Blog template by Blogger with customisation by the publisher.
All content is original and was created by me, the author and publisher of I Work in Pages.
Quotations and images are attributed where applicable.
No republication without express prior permission.
Blog template by Blogger with customisation by the publisher.