Do a Google search for Christmas clipart - and it returns over a million results. Many images are free to download and use, some are for sale. But there are many simple tricks to create your own original clipart or ad a festive theme to your projects.
Here are a few of my favourites:
1. Use your own photos as background images.
2. Create panoramic photo strips
3. Use elements from Pages templates
4. Create graphic elements from the Character Pallette
5. Create your own clip art.
1. Use your own photos as background images for festive theme.


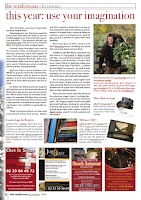
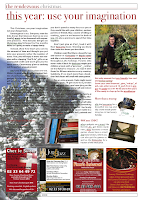
Here I put a narrow vertical mask on the photo of a snow covered fir tree on a sunny Winter day in my garden. Then added a picture frame with blurred edges (Object Inspector - Picture Frame - bottom left option) and put this graphic element on the outside margins of a double page magazine spread. If there is text or other graphic elements over the background photo, fade it to around 80 percent (reduce Opacity in Graphic Inspector). Read a more detailed description of this method in this previous article.
To see the original picture click here

2. Create panoramic photo strip.
- Choose your photo, import into the Pages project and duplicate (once or more).
- Flip second photo horizontally (in Metrics Inspector)
- Align the photos so that they look like one continuous image. Here I used the edges of the glass shelves for aligning. You may need to move photos backwards and forwards to achieve a perfect fit (this option is under Arrange menu).
- Put masks on all photos and adjust the Mask height dimensions to be the same for all photos. Vertical coordinates (distance from the top edge of the page) should also be exactly the same for all masked photos in the strip.
Now you have a perfect panoramic shot.
- Next put a text box over the image and type your heading.
Photo was made in Café du Théatre, Vire, Normandy with Nikon Coolpix 8.1 megapixel camera.
3. There are many graphic images in iWork/Pages templates
They can be used to add a holiday theme. Here I used a photo of champagne glasses from the Catalogue template. Choose Image Fill in Object Inspector and pick the photo. Set Image Fill to Scale to fill. One advantage of using Image Fill-Scale to fill is that the photo automatically adjusts itself to fill the object as you resize it. Here I just dragged down the bottom edge of the box to fill whatever space was available. You may find Image Fill easier to work with than Masking.
4. Create graphic images from characters in the Palette
There are several snowflakes and stars in the Character Palette>Miscellaneous Symbols (if you don't see the palette in your screen menu, go to System Preferences>International>Input Menu and check the Character Palette box to activate it). Characters from the Palette behave like ordinary letters. To make them into graphic elements choose colour as you would for text, enlarge as needed and take a screenshot to get a PNG file. (Screenshot: press Command+Shift and type 4, drag crosshairs over the characters and release)

You may want to remove white background with Instant Alpha (under Format menu) if your graphics go onto a coloured background. (as with the Holly twig in the box at the top)
5. Create your own clipart.
Read how to here and here.
And read more about clipart for Pages here


No comments:
Post a Comment