I was folding the corner of a page in the book I'm reading and thought, hey, that could be a nice visual trick! How do I do it in Pages?
Here is what I've come up wtih:
- Draw a triangle with the Draw Tool (three clicks plus fourth to close the shape). There is a ready made 'Right Triangle' shape, but I found it too fussy to rotate and resize it.
- Position the triangle over the page where you are going to fold the corner. Here it's a page from a note-pad. Use snap to grids (Alignment Guides) to fit it flush with the note-pad.
 |
| Flip |
- Pick colour of the background or simply choose white colour fill for the shape. This first triangle will hide the folded corner of the page.
- Next, duplicate (Command+D) the triangle. In Metrics Inspector flip the duplicate sideways, then flip vertically, position so that it points inside the note-pad.
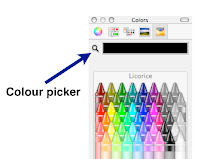
- To give it the natural look of folded paper pick the colour of the page in the note-pad. In Graphic Inspector click on the colour well, then on the magnifying glass in the Colours viewer next to the colour well and then click on the page of the note-pad as close to the shape as possible.
 - To give the corner some volume choose ‘Gradient Fill’. For Stroke (shape frame) choose a colour slightly darker than the page and make it thinner. Add Shadow to the folded corner. Rotate the Angle wheels for gradient fill and for shadow to achieve the most natural look.
- Select all three Shapes (objects) and under Arrange menu Group them so that you can move, resize and copy the finished page with folded corner within your Pages project.
 |
| Settings for the corner shown |
The whole work takes about 10-15 minutes.
If you also use PhotoShop, have a look at this article which describes how to fold corners in a different way.
 |
| Finished folded corner |
Tip:


Nice. Thanks for the tip
ReplyDeleteglad you liked it.
ReplyDelete