Showing posts with label text as image. Show all posts

Thursday, August 22, 2013

Free Banking.


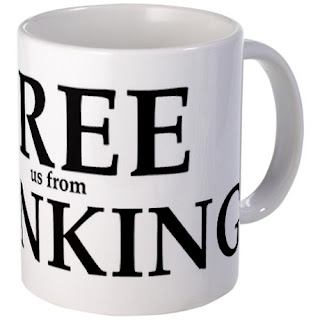
'Free [us from] Banking' is another design I've added to my gallery on CafePress. You can see it there on various products, such as t-shirts, bags and mugs, as in the picture here. Click on the picture to see the products with this design on CafePress.

The effect I was aiming at is to have two slogans in one. When you glance at it quickly, you only see 'Free Banking.' When you look again, you see 'Free us from Banking.' 

I put each line in a separate text box which allows more freedom in moving the chunks of text. 

I made the key word 'Free' largest at 180 points, 'Banking' smaller at 144, and 'us from' at 34. The font used is Palatino Bold.

For best results when printing in black type, remember to change the colour to 'true black.' In the Colour viewer (Inspector), click on sliders, choose CMYK and set Cyan, Magenta and Yellow at zero, and Black (K) at 100 percent.

Convert your Pages document to PDF and upload to CafePress.

Thursday, June 20, 2013

Comic Life: Curve Text, Outline Letters and Put Images inside Them.

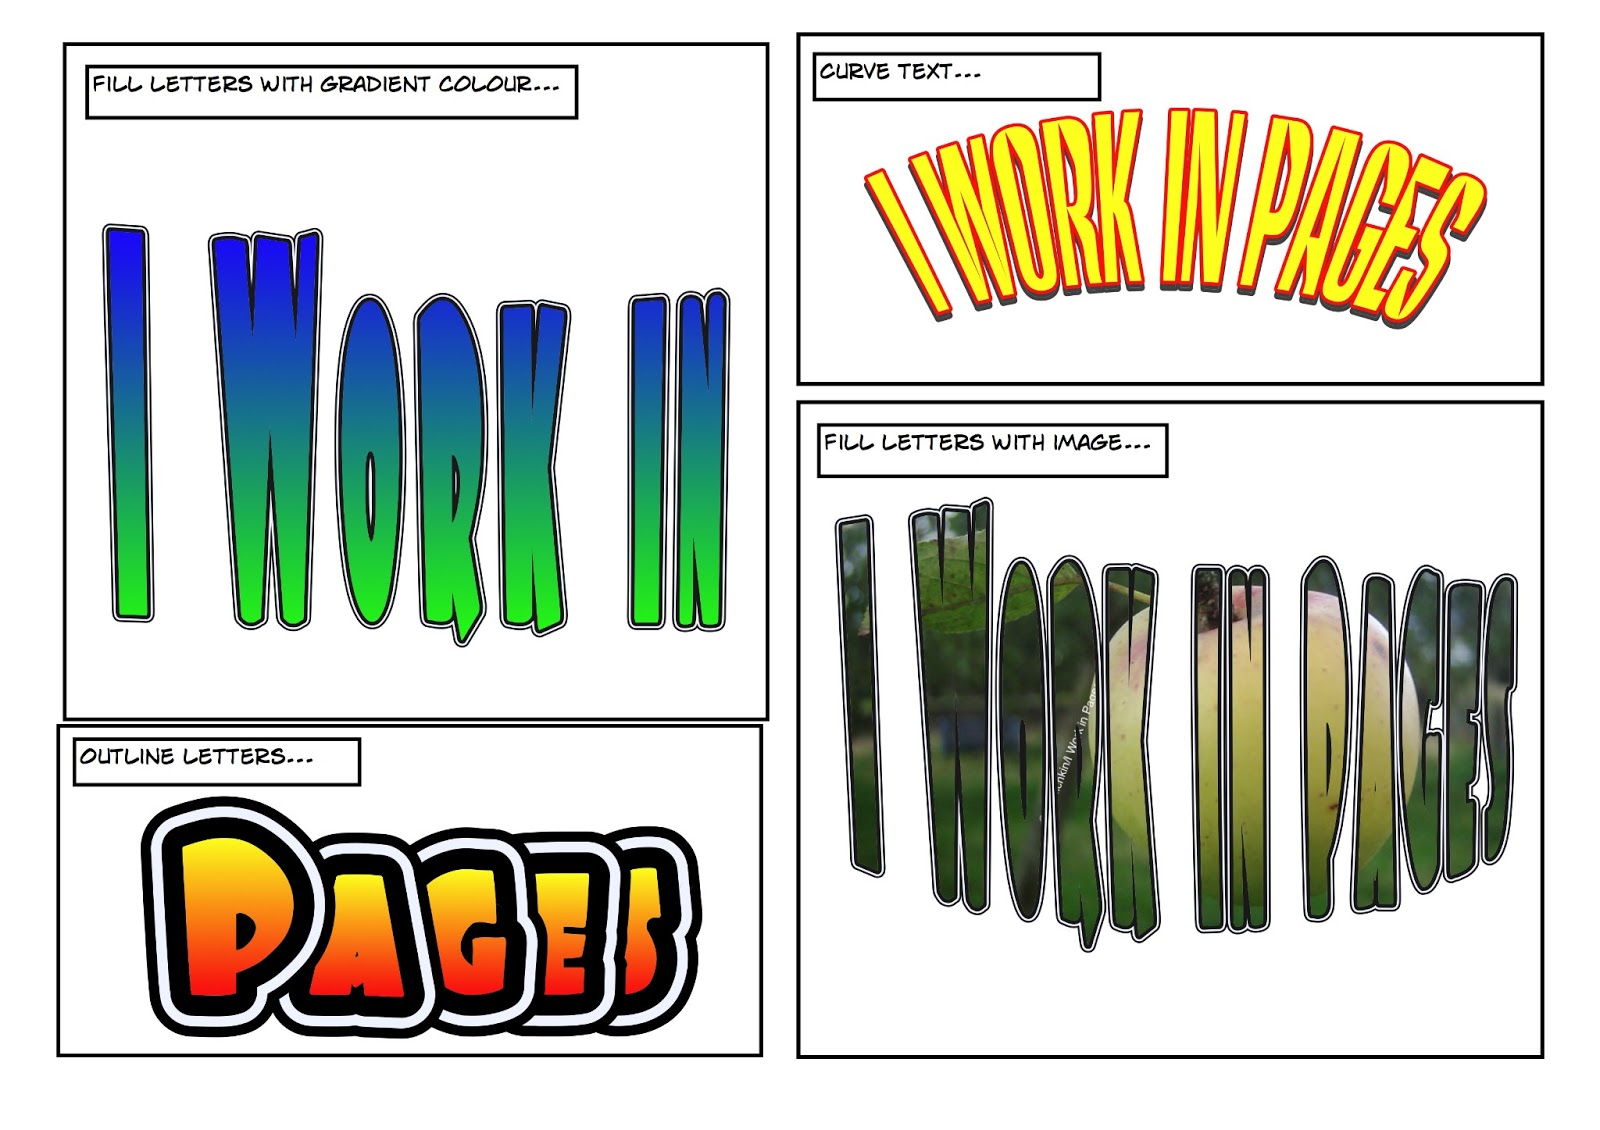
A comic showing what you can do.


Readers often ask how to curve text in Pages or how to outline the letters. Filling letters with images is another design trick popular with the readers of this blog.

I’ve mentioned several times here Comic Life, a graphic and layout programme from Plasq.com

It is designed to put together comic strips with graphic images or photos in various layouts and add captions and speech bubbles to the images.

Comic Life has a colourful and joyful interface and is very easy to use. It’s tools, menus and techniques are very similar to iWork’s. There is a familiar Inspector and many icons in the Toolbar are the same as in iWork. If not they are easy to understand. If you are already comfortable with iWork it will take no time for you to start using Comic Life straight away, simply by following prompts and clicking around.

Full completed designs can be exported to a number of popular formats, including PDF, ePub, JPEG and PNG. And elements of Comic Life designs, such as chunks of text or text and graphics can be copy-pasted into iWork projects.

Comic Life may look like child’s play but it has a number of powerful features not available in iWork. Here is what you can find in Comic Life 2.2.6 that can be useful in iWork projects.
  
1. Curving text.
Text can be curved by dragging blue handles of the selected text box. Click on Lettering in the window at the bottom of your document and drag it to a comic panel.

2. Outlined text.
Text in templates is already outlined. Change the number and colour of the outlines in the Graphic Inspector under Stroke.

3. Colour-filled typography.
Letters and other typographical symbols can be colour-filled. Many come with gradient (changing) colour. Choose either gradient or solid colour fill in Graphic inspector by clicking in the colour well and then in the colour palette. Click on the comic panel to choose a background colour for the panel.

4. Image inside text.
If you want to put an image inside letters, go to Graphic Inspector and choose Image from the Fill drop-down menu. Drag an image from iPhoto or from the Desktop into the image well. It will fill the letters. Here, I’ve used the same apple photo that’s in the graphic panel and favicon of this blog.

There is much more of course. Comic Life is a fun and useful programme that will complement whatever you do in iWork.

Comic Life retails for $29.99 on Plasq.com and from Mac App Store. 


Sunday, November 07, 2010

How to give text gradient (flowing) colour

Adding gradient (flowing, changing from one to another) colour is a design trick and as such should be used sparingly – for headings, background and special effects. Apple's iWork team wisely avoided this feature which is available in many graphics specific programmes. Wisely, because it keeps Pages simple, intuitive and not bloated with features you rarely, if ever, use.
But if you do want to give your text a flowing colour, there is an easy way of doing it. 

- type text as usual (black letters on white background), make them bold, increase the size;
- make a screenshot of the text: Command+Shift+4 (⌘+⇧+4), image should appear on your Desktop as PNG file;
- create (import) a shape, give it gradient colour fill (option in Graphics inspector);
- import the screenshot and slide it over the shape;

- remove black text with Alpha
 - as you do it the flowing colour appears through the letters, 'filling' them.

And a nice touch: to give your letters a glowing effect add shadow to the screenshot and give it one of the colours of the gradient combination.

When finished group the screenshot and the shape behind it, print to PDF or JPEG and use it in your project/document (resize, crop or mask as needed).
In the example above for gradient fill I used Maraschino and Lemon from the Colour Palette (Viewer). The font is Minion Pro, 64 points.


Read also Transparent Text (Putting Image Inside Letters) 

Monday, July 19, 2010

Letters As Image: Squash and Pull

I've just posted about putting image inside transparent letters. Another great trick with text as image is that you can stretch it wide and high the way no kerning or spacing would allow you to.

Look, here I squashed the word 'Normandy' and pulled it up:


And even more:


In Metrics Inspector (the litle ruler icon) uncheck 'Constrain Proportions' box and you can now reduce the width of the text with the images remaining inside creating a more upward surging, 'gothic cathedral' feel or, the other way round, increase the width and reduce the height of the image to give it a squat, 'romanesque' view.

This simple trick can be used not only when you want to put images inside letters. It is also of great help for cards, posters or book covers when the main goal is to make the key word of phrase stand out and grab the viewers attention.

Read the full how-to here
Related Posts Plugin for WordPress, Blogger...

Copyright

© 2006-2010, 2010-2017 Alexander Anichkin, All Rights Reserved.
All content is original and was created by me, the author and publisher of I Work in Pages.
Quotations and images are attributed where applicable.
No republication without express prior permission.
Blog template by Blogger with customisation by the publisher.