Showing posts with label D-Day. Show all posts

Monday, June 03, 2013

D-Day 1944. Making Maps in iWork.

D-Day Landings on 6 June 1944.


I've made numerous maps and schemes relating to D-Day and the Battle for Normandy in 1944, when Allied Forces landed in France to fight the nazis in Europe.

All design work can be done with the tools available in iWork Pages.

Some of my maps are professionally published in books about the Battle for Normandy.

See this previous post on how to design maps in iWork/Pages and follow the D-Day label to read more.

Contact the editor if you'd like to commission similar work.


Read more in my new book 'iWork for Mac OSX Cookbook' (2012)
Follow me on Twitter at iworkinpages  
Like my page I Work in Pages on Facebook 
and add me to your circles on Google+ 


Saturday, April 18, 2009

Designing D-Day Map in Pages. Part Two

Note: see the finished map and read Part One of this article here


THE FIRST STEP is to find a relevant map and make a cut-out of the area you are going to use in your project.

Scan the map from a book, atlas or take it off the internet, Google maps for example. One simple way of doing this is to make a screenshot: Command+Shift and type 4. The cursor turns into crosshairs. Drag it over the area and let go, after a camera shutter sounds you get a .png graphic file on the Desktop. Import it into your Pages document.

NEXT STEP is similar to working with tracing paper. You need to cover your map with a custom shape. Click on Shapes in the toolbar and slide down to Draw tool. The cursor changes into a fountain pen tip. Each click of the 'pen' leaves a red dot in the document, the consecutive dots are connected to each other and as you continue clicking they form an outline of the map, the seashore for example. At this stage it can be done roughly, just to create the shape. Later the shape of the map can be edited: each dot you leave while creating the custom shape can be moved in editing mode.

The custom shape will have default wrapping, colour fill and stroke (frame). It is better to uncheck 'object causes wrap' in Wrap Inspector for the main shape as well as for all the next objects and text boxes, so that text on the map is not affected by wrapping.

In Graphic Inspector change colour fill and colour and thickness of stroke. You may want to choose 'no fill' to see the map under the custom shape, or, as I did, change opacity of the colour fill to about 50 percent (see picture below left). That way you get a feel of what your own original map will look like, but also see the cutout map area you are tracing.


When the custom shape is finished roughly, edit it to follow exactly the contours of the cutout. Click on the shape, pause and click again. The red dots will show. Click on a red dot and it changes into a circle. This can be moved with cursor or with keyboard arrows. 'Snap to grid' function can be annoying at this stage as the circles will try to align themselves with other objects. To disable this function press Command as you start moving the dots.

To show the sea on the map, insert a rectangular shape, in Graphic Inspector choose a sea-like colour and resize the shape to fit with the right angles at the bottom of the map. Then under Arrange menu Send to Back.

After fine tuning the custom shape you are ready to add other map elements. Please come back to read my next posts.

Read how to add and edit arrows to the map here.


Read more in my new book 'iWork for Mac OSX Cookbook' (2012)
Follow me on Twitter at iworkinpages  
Like my page I Work in Pages on Facebook 
and add me to your circles on Google+ 

Saturday, April 11, 2009

D-Day Map: making maps, schemes and plans in Pages


Designing original maps in Pages is a fiddly business, so make sure the work is worth your time and effort. But the end result may be extremely satisfying creatively and add a striking difference to your project. If you are not sure, just use one of the many internet mapping services, Google Maps are excellent for example.

Here is one of the maps I made for the forthcoming 65th anniversary of the D-Day - Allied landings in Normandy in June 1944, when 200 thousand men went ashore or parachuted in France to fight the nazis. For many of the surviving veterans it may be the last opportunity to take part in remembrance ceremonies. In Britain there are only 500 men left now.

The map was created entirely in Pages. It shows the coastal area of Lower Normandy with five landing beaches where American, British and Canadian forces attacked on the morning of 6 June 1944.

In the coming days I will describe the techniques used here, please come back to read more.

Read Part Two of Designing D-Day Map in Pages here.

Thursday, January 04, 2007

Maps in Pages


4 Jan 07

There is a map in one of the Pages ready-made templates 'Classic Brochure' (three panel, Vineyard B&B) - but the map image does not really give clues as to how to construct it....

Macs are famous for being user friendly because they replicate operations we are already used to doing with pencils, scissors and glue. There is very little that you can't do in Pages. One challenge for me was to create a map. As it turned out constructing maps in Pages is very similar to using tracing paper.

Well, here is one way of putting together a nice looking map:

1. Scan a real geographical map or take it off the internet - in JPG or PDF, it doesn't really matter so long as it can be imported in Pages.
2. Drop it into your pages document.
3. Use draw tool (a new feature in Pages 2) to create a custom shape lying on top of the scanned map. Follow the contours of the area you need for your map in a Pages document.
4. Fill the custom shape with colour (green or light brown for land area), gradient colour, or even an image - whichever suits your project best.
5. If it is a seaside area, create square shape, colour fill it with blue, put the blue square shape over the custom shape (map outline), adjust dimensions so that they match exactly and under Arrange menu 'Send backward'.
6. Use text boxes for placenames. They can be rotated to fit the map.
7. Use arrows for directions.
8. Use oval shapes or create more custom shapes to show areas needed on maps.
9. Move place name boxes and arrows into required position.
10. Command or Shift Click to select all objects and Group (under Arrange menu)

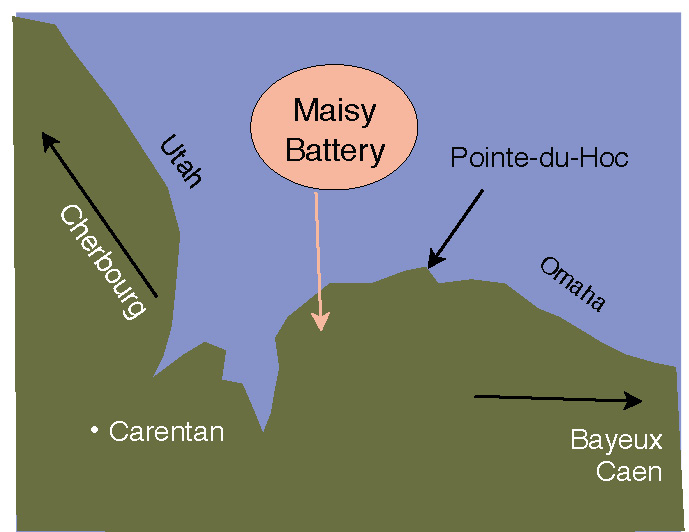
So here is what I constructed to show the area in Normandy where a huge, but long forgotten German WWII battery was recently uncovered.
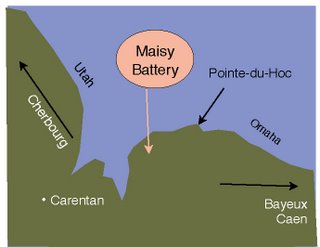
Note: wrapping should be killed or set at zero.

Now your map is ready to be placed on page - resized, rotated etc. Remember to check the 'constrain proportions' box in dimensions inspector when resizing. It may also be useful to 'Print' your map as a PDF document and then import it into your project.


If anyone knows a better solution I'd like to hear very much.


Addendum (2011): Read later articles on designing maps (with illustrations):
D-Day Map: Making Maps, Schemes and Plans 
Designing D-Day Map in Pages (Part Two)
Add Arrows to Maps in Pages (how to change the shape and curve of the arrows)

Related Posts Plugin for WordPress, Blogger...

Copyright

© 2006-2010, 2010-2017 Alexander Anichkin, All Rights Reserved.
All content is original and was created by me, the author and publisher of I Work in Pages.
Quotations and images are attributed where applicable.
No republication without express prior permission.
Blog template by Blogger with customisation by the publisher.